
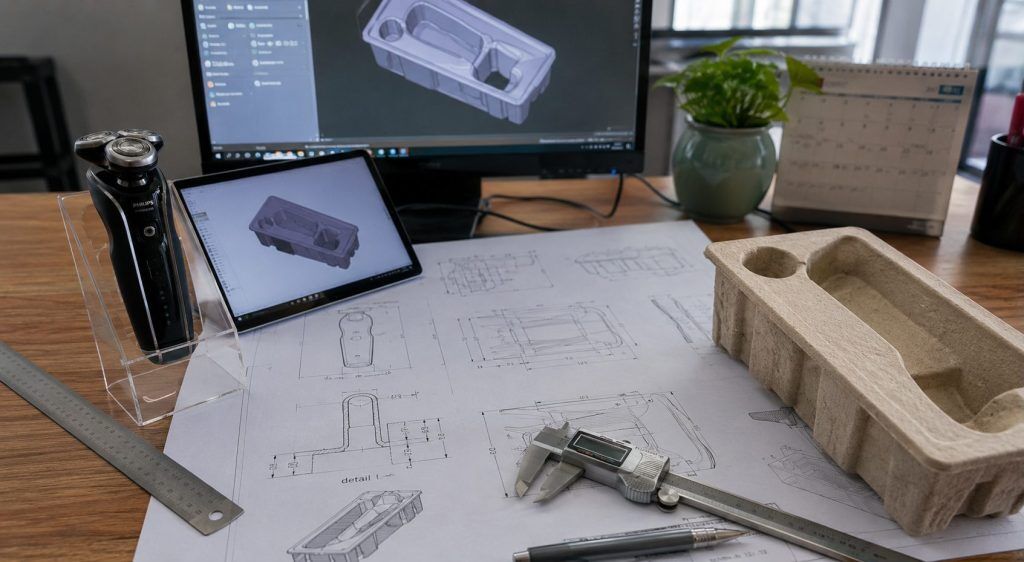
A Step-by-Step Timeline from Design to Physical Samples
Introduction
When companies start exploring custom molded pulp packaging, one of the first questions they ask is surprisingly consistent:
“How long will the development process take?”
It sounds like a simple question, but the real answer is more nuanced. Unlike off-the-shelf packaging, custom molded pulp packaging involves engineering, structural validation, material considerations, and sometimes multiple rounds of iteration before a final production-ready solution is achieved.
In reality, the development timeline depends less on a fixed “standard lead time” and more on three key factors:
- How complete the initial product information is
- How complex the product structure is
- How quickly feedback and decisions are made during the process
In this article, we’ll walk through a typical development workflow used in custom molded pulp packaging projects at InNature Pack, so you can better understand what actually happens behind the scenes—and how you can optimize your own project timeline.
Understanding What Affects Development Time
Before breaking down the timeline step by step, it’s important to understand one thing clearly:
Not all projects follow the same schedule.
Even if two customers request a “similar tray,” the development time can vary significantly.
The main factors influencing the timeline include:
- The clarity of initial requirements
- Whether drawings or 3D files are available
- Structural complexity of the packaging
- Number of products to be packed within one solution
- Whether prototypes are required before tooling
- Speed of customer feedback and approvals
Among these, one of the most underestimated factors is actually communication speed. In many cases, the manufacturing and design work itself is relatively fast—the back-and-forth feedback loop is what extends the timeline.
Step 1: Project Information Collection (1–2 Days)
Every packaging project starts with one critical step: understanding the product.
At this stage, our goal is to collect all the necessary information to begin structural design.
Typically, we request:
- Product dimensions (L × W × H)
- Product weight
- Product photos from different angles
- Packaging box dimensions (if available)
- 3D files or CAD drawings (if available)
- Any specific packaging requirements (protection, stacking, presentation, etc.)
The more complete the information, the faster the project can move forward.
In many cases, when all necessary data is provided upfront, the design process can start immediately without delays.
Additional Information That Can Speed Up Evaluation
Besides product specifications, providing commercial requirements early in the project can also help shorten development time.
Useful information includes:
- Target annual volume
- Target market
- Expected packaging appearance
- Budget expectations
For example, a premium retail package may be better suited for wet-press molded pulp, while an industrial protective insert with a tighter budget may be more suitable for dry-press production.
When these requirements are communicated early, our engineering team can recommend the most appropriate manufacturing process from the beginning, reducing unnecessary redesign work later.
In some cases, identifying the right manufacturing process at the start can save more time than accelerating any individual development stage.
What can slow this stage down?
Sometimes customers only provide a general idea such as:
“We need a molded pulp insert for our product.”
While this is a good starting point, it is not enough for engineering work.
Without exact dimensions or product references, the design stage cannot begin accurately.
Step 2: Structural Design (Typically Within 48 Hours)
Once complete product information is received, our engineering team can usually deliver an initial structural design within 48 hours.
This is one of the key advantages of working with an experienced molded pulp manufacturer with in-house engineering capability.
The initial design typically includes:
- Product positioning within the tray
- Structural support and reinforcement areas
- Fit and tolerance considerations
- Stackability and transport optimization
- Preliminary manufacturing feasibility check
At this stage, the design is not final—it is a functional concept meant for review and discussion.
Design Revision Stage
After receiving the initial design, customers often request adjustments.
This is completely normal and expected in custom packaging development.
The revision cycle varies depending on project complexity and decision-making speed.
Scenario A: Fast Approval
If the first design meets expectations:
Timeline: ~2 days total
Scenario B: Moderate Revisions
If 2–3 rounds of adjustments are needed:
Timeline: ~1 week
Scenario C: Multiple Iterations
If the project involves multiple stakeholders or evolving requirements:
Timeline: 2 weeks or more
At this stage, communication efficiency becomes the key factor affecting overall speed.
Step 3: Prototype Validation (Typically Within 3 Days)
Before moving into molded pulp tooling, some projects benefit from an intermediate prototype validation stage.
At InNature Pack, we do not treat this step as mandatory or optional in a rigid way. Instead, we evaluate each project and may recommend a suitable approach based on the product and risk level.
Depending on the situation, we may suggest:
- Foam prototype samples
- 3D-printed resin prototypes
Option 1: Foam Prototype
Foam prototypes are useful for early-stage evaluation and are typically used for:
- Basic product fitting checks
- Initial structural concept validation
- Early design visualization
Option 2: 3D Printed Resin Prototype

For projects requiring higher precision, we may recommend a resin-based prototype.
This is especially useful when:
- The product has multiple components or varying dimensions
- Tight tolerances are required
- The packaging must align precisely with product geometry
Why Is This Step Important?
Although prototype validation adds a few extra days to the timeline, it often plays a critical role in reducing overall project risk.
By validating the structure before molded pulp tooling begins, potential issues can be identified early—when they are still inexpensive and easy to fix.
In many real-world cases, this step helps avoid unnecessary tooling modifications later in the process, which can be significantly more costly and time-consuming.
Is This Step Always Required?
Not necessarily.
Some projects can proceed directly to molded pulp sampling after design approval.
Others, especially those involving multiple products or complex packaging structures, benefit significantly from prototype validation.
Our engineering team typically recommends the most efficient path based on each specific case.
Step 4: Sample Tooling Production (Typically 10 Days)

Once the design is finalized, sample tooling production begins.
This is where the packaging moves from digital design to physical manufacturing reality.
For most molded pulp packaging projects, sample tooling can be completed in approximately 10 days.
What does sample tooling include?
Typically:
- Forming mold
- Hot press mold
- Trimming mold(if required)
These tools are used to produce molded pulp samples for testing and evaluation.
Projects Requiring Additional Tooling
Some packaging designs require additional tooling, such as punching dies used to create openings, slots, or special structural features.
When this is necessary, tooling production may take approximately:
3 additional days
Typical Tooling Timeline Overview
| Type of Tooling | Lead Time |
|---|---|
| Standard sample tooling | ~10 days |
| With additional tooling requirement | ~13 days |
Step 5: Molded Pulp Sample Production and Evaluation
After tooling is completed, we proceed with sample production.
This is the stage where everything comes together—structure, fit, and material performance are all tested in real conditions.
This phase typically includes:
- Trial production runs
- Product fitting tests
- Structural integrity checks
- Packaging performance evaluation
- Sample preparation and shipping
Once completed, physical samples are sent to the customer for final review.
What Happens After Sample Approval?
After receiving samples, the project typically follows one of three paths:
Scenario 1: Approved Immediately
If the sample meets all expectations, the project moves directly into production tooling preparation.
Scenario 2: Minor Adjustments
Small refinements may be required to improve:
- Fit accuracy
- Structural strength
- Surface finish
In this case, a revised sample may be produced quickly.
Scenario 3: Major Design Changes
In some cases, the concept may need adjustment based on real-world testing.
The project may return to the design stage before proceeding further.
Timeline Summary
To better understand the full process, here is a simplified overview of typical timelines:
Fastest Scenario
Complete product information provided upfront
→ Quick design approval
→ Direct molded pulp sampling
Total: ~12–15 days
Typical Scenario
Information collection
→ Design and revisions
→ Prototype validation (if needed)
→ Sample tooling
→ Molded pulp sample production
Total: ~3–4 weeks
Complex Scenario
Multiple revisions
→ Prototype iterations
→ Tool modifications
→ Additional testing
Total: ~4–8 weeks
The Fastest Development Path Is Not Always the Most Cost-Effective
In packaging development, speed is important—but it is not the only factor that matters.
Many buyers naturally want to shorten timelines as much as possible. However, in real projects, skipping validation steps can sometimes lead to:
- Tooling modifications
- Additional sampling rounds
- Unexpected delays
- Higher overall development costs
In many cases, spending a few extra days on prototype validation can actually save weeks later in the process.
The key is not just speed—but efficiency and risk control.
A well-structured development process ensures that when tooling begins, the design is already stable and validated.
Final Thoughts
Custom molded pulp packaging development is not a single-step manufacturing process—it is a structured engineering workflow that balances design, validation, tooling, and production.
While every project is different, most follow a similar path:
Information → Design → Prototype (if needed) → Tooling → Sampling → Approval
With clear communication and well-prepared data, it is often possible to move from concept to physical samples in just a few weeks.
At InNature Pack, our goal is not just to produce packaging quickly—but to help customers achieve the right balance between speed, cost, and design reliability.
Planning a custom molded pulp packaging project?
Share your product dimensions, photos, or 3D files with us, and our engineering team can typically provide an initial structural design within 48 hours. We’ll also recommend the most efficient development path based on your product complexity and project goals.
