
When people first see a molded pulp tray, egg carton, food container, or protective insert, it may look like a simple paper product. In reality, producing consistent molded pulp packaging involves a sequence of specialized equipment. Each stage affects the product’s appearance, strength, fit, production efficiency, and final cost.
The exact production line is not identical for every project. A standard egg tray, for example, does not need the same level of finishing as a smooth retail package for cosmetics or electronics. Some products only need forming and drying, while others also require hot pressing, precision trimming, or punching. Still, most molded pulp products follow the same basic route: molds are made first, pulp is prepared, the product is formed, moisture is removed, the edge is finished, and the product is inspected and packed.
This article explains the main equipment used along that route and what each machine contributes to the final packaging.
1. CNC Machines: Making the Production Molds
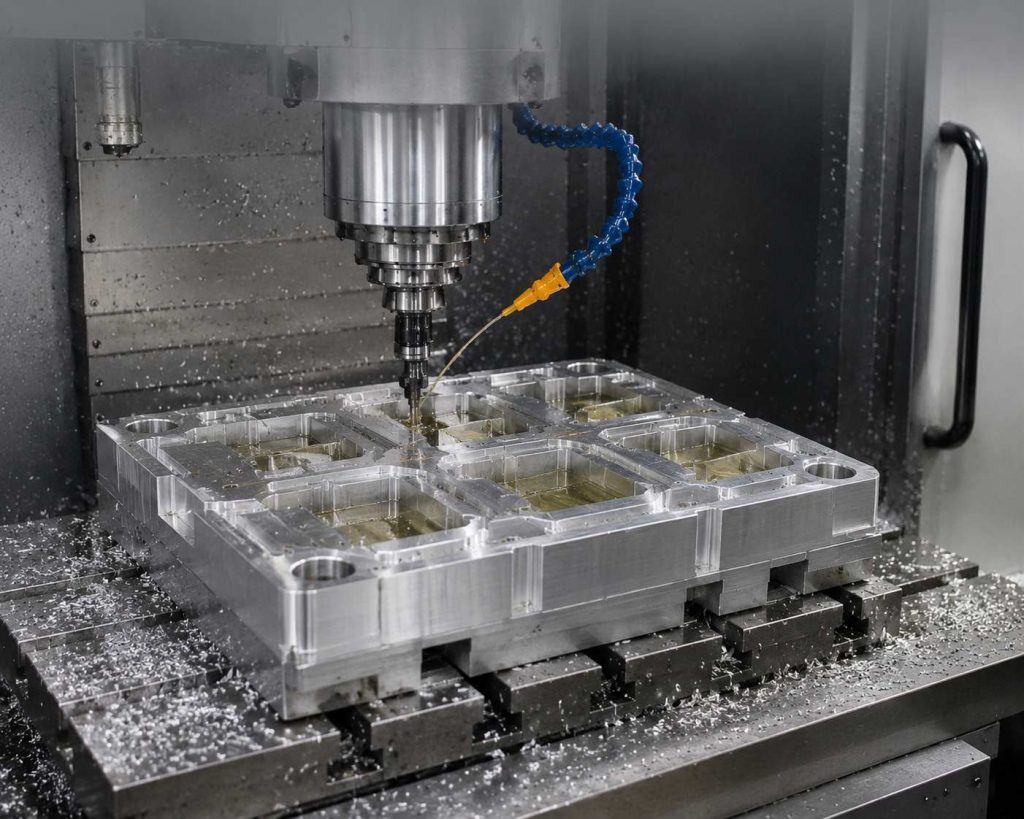
Before a molded pulp product can be produced, the required molds must be made. CNC machining centers are an important part of this stage. Using the approved 3D drawing, a CNC machine processes the mold material to create the product shape and the technical details needed for production.
There is usually more than one type of mold involved. The forming mold creates the basic pulp shape. If the product needs hot pressing, separate heated molds may be required to set the final shape and improve the surface. A trimming die may be needed to remove the excess edge, while a punching die may be added for precision holes or more complex cutting requirements.
The material used for each tool depends on its function. Some forming tools can use ABS because their main role is to shape the wet fiber. Hot-press molds are normally aluminum, which transfers heat efficiently. Trimming and punching tools may use wood-and-steel dies or steel tooling, depending on the required precision and cutting structure.
For custom molded pulp packaging, mold production is often the first major investment and the first step on the production timeline. For stock products, the manufacturer can use an existing mold, which is why standard items can usually be supplied more quickly and without a new tooling charge.
2. Pulping System: Preparing the Raw Material

Once the molds are ready, the production process starts with the raw material. Molded pulp can be made from sugarcane bagasse, bamboo fiber, recycled paper pulp, virgin pulp, or a combination of suitable fibers. These materials do not go directly into the forming machine in their original condition. They first need to be mixed with water and prepared as a controlled pulp slurry.
The main equipment at this stage is the pulping system. It commonly includes a hydrapulper or pulper, mixing tanks, pumps, pipes, and, where necessary, screening or cleaning equipment. The pulper breaks down the fiber material in water, creating a more even slurry. Mixing tanks then help maintain the desired pulp concentration before the slurry is sent to the forming equipment.
This preparation stage is easy to overlook, but it matters a great deal. Fiber selection, pulp consistency, cleanliness, and mixing stability all influence the finished product. They can affect the natural color, surface texture, wall consistency, and overall strength of the packaging. If a project requires a white appearance, a specific brown tone, or a particular fiber material, these requirements need to be controlled from the pulping stage onward.
3. Forming Machine: Creating the Basic Product Shape
The forming machine is the core piece of equipment in molded pulp production. This is where loose fibers in the slurry become a recognizable tray, insert, carton, lid, or container.
The principle is straightforward: a forming mold is brought into contact with the pulp slurry, and vacuum draws the water through the mold surface. The pulp fibers remain on the mold and gradually build up into the required shape. Once enough fiber has been collected, the wet molded product is transferred to the next stage.
Although the principle is simple, the forming process requires stable control. The mold design, vacuum system, pulp concentration, forming time, and cavity layout all influence the result. These factors determine whether the product forms evenly, whether the wall thickness is consistent, and how efficiently the line can operate.
For high-volume items, one machine may use several cavities in one cycle to improve output. Larger or more complicated products may have fewer cavities because of their size, shape, or handling requirements. This is one reason why two products made from a similar material can have very different production capacities and prices.
At this point, the product still contains a large amount of moisture. It has the basic form, but it is not yet ready for shipment or use.
4. Drying Equipment: Removing Moisture From Dry-Pressed Products
Drying equipment is mainly used for dry-pressed molded pulp products. After forming, these products still contain a high level of moisture and need to be dried before they can be handled, trimmed, stacked, or packed. The drying stage removes the remaining water and gives the product the stability needed for the following operations.
Depending on the product and production setup, dry-pressed products may be dried through air drying, drying ovens, heated tunnels, or other controlled drying systems. For larger-volume production, dedicated drying equipment is important because it allows the line to operate more consistently and reduces the waiting time between forming and finishing.
Drying is not simply a matter of applying more heat. It must be carefully controlled. If the product dries unevenly or too aggressively, it can warp, shrink irregularly, or lose dimensional consistency. The required drying time also affects line capacity. A product that needs a longer drying cycle will occupy more space and equipment time before it can move forward.
Wet-pressed products follow a different route. After forming, they are normally transferred directly to the hot-press stage, where heated molds remove moisture and set the final shape. Therefore, they do not usually require a separate drying oven or drying tunnel. The appropriate route depends on the product’s required wall thickness, surface quality, dimensional accuracy, and finishing requirements.
5. Hot-Press Machine: Improving Surface and Dimensional Stability

For products that require a smoother surface, more accurate dimensions, or a more refined appearance, hot pressing is an important finishing step. A hot-press machine uses heated molds and pressure to further remove moisture while setting the product into its final form.
The difference is especially visible in premium packaging. After hot pressing, the surface can become smoother and more uniform, edges and structural features are better defined, and the product is more stable for stacking or assembly. This is useful for packaging that must fit closely around an electronic device, a cosmetic item, a glass jar, or another retail product where presentation matters.
Hot pressing can also improve dimensional consistency. This does not mean that molded pulp becomes a rigid plastic material, but it helps control the final shape more effectively than drying alone. For products with lids, fitted trays, or components that must nest together, this extra stability can be particularly valuable.
However, hot pressing also adds equipment time and tooling requirements. Heated molds must be designed for the product, and each cycle takes time. For this reason, a hot-pressed product may have a different production capacity and cost structure from a more basic molded pulp item. The choice should be based on the packaging requirement, not simply on whether a more refined surface looks attractive.
6. Trimming Equipment: Creating a Clean Final Edge
After forming and, where required, drying or hot pressing, the product may still have excess material around its perimeter. This is often called a trim flange. Trimming equipment removes that excess material and creates the final outer shape.
Trimming is important for both appearance and function. A clean edge makes the packaging look more finished, but it also helps ensure that the external dimensions are suitable for stacking, assembly, carton packing, or fitting with another component. For example, a tray that needs to sit inside a box or a lid that needs to match a base cannot rely on an uncontrolled edge.
For products with a relatively simple cutting line on one plane, a standard trimming die is often sufficient. The product is placed in position, and the die cuts the edge to the required profile. The type of trimming tool depends on the product geometry, tolerance, output requirement, and expected edge quality.
Even when the end product looks simple, trimming can be a critical operation. Poor trimming can create uneven edges, inconsistent dimensions, or excess fiber around the product. That is why trimming should be considered as part of the production route, rather than as a minor final detail.
7. Punching Equipment: For Precision Holes and Complex Cutting
Some product features cannot be achieved reliably through standard trimming alone. In these cases, a separate punching machine, punching die, or ring-cutting tool may be needed.
Punching is commonly used for small holes, detailed openings, or shapes that need cleaner and more accurate cutting. It is especially useful when holes are too small to form consistently during the molding stage. Small molded holes may be partly covered by fibers, while ordinary trimming may leave burrs or rough edges. A punching die can produce a more defined result.
Punching may also be needed when the cutting line is not on the same plane, when a product needs high concentricity, or when the permitted dimensional deviation is very limited. For example, a product with a precision opening for a component, a hanging feature, or a fitted assembly may need punching to ensure that the feature performs as intended.
Because punching tools are more specialized, they can add to the initial tooling cost. But for the right product, this investment is practical: it can improve consistency, reduce manual finishing, and avoid quality problems caused by rough or inaccurate openings.
Ring Cutting for Products With No Remaining Edge

Some molded pulp products require the edge to be cut completely around the perimeter, leaving no visible trim flange or excess material. This type of operation is often referred to as ring cutting.
Ring cutting is useful when the product needs a clean all-around edge, a more refined appearance, or an accurate fit with another component. Compared with standard trimming, it requires more specialized tooling and more careful positioning of the product during cutting. It may therefore add to the tooling cost, but it helps achieve a cleaner and more consistent final result.
Not Every Product Uses Every Machine
One of the most useful things to understand about molded pulp production is that there is no single equipment list for every product. The necessary machinery depends on what the packaging needs to do.
A basic egg tray may only require forming, drying, and finishing or trimming. A food tray, fitted lid, or retail container may require more controlled finishing to achieve clean edges and stable stacking. A premium insert for electronics, cosmetics, or glass products may need hot pressing for a smoother surface and more consistent dimensions. If the design includes small holes, complex cutting lines, or a feature that must fit accurately with another part, punching equipment may also be needed.
This is why it is not always possible to quote a custom molded pulp project accurately from only a photo. The product’s use, dimensions, appearance requirement, target quantity, and finishing details all determine the appropriate process and equipment. Choosing only the simplest route may reduce the initial cost, but it may not deliver the required fit, appearance, or production consistency.
Conclusion
Molded pulp packaging is produced through a coordinated sequence of equipment rather than a single machine. CNC machines prepare the molds; pulping equipment turns raw fiber into usable slurry; forming machines create the basic shape; drying and hot-press equipment remove moisture and improve stability; trimming and punching equipment finish the edge and functional details; and inspection and packing equipment prepare the products for delivery.
The right combination depends on the packaging itself. A simple protective tray and a premium retail box may both be made from molded fiber, but their production routes can be very different. Understanding the equipment behind the process makes it easier to evaluate tooling, lead time, unit cost, and the level of finish that a product can realistically achieve.
If you are developing a molded pulp packaging project, you can share your drawing, sample, product dimensions, or target quantity with InNature Pack. We can review the requirements and recommend a suitable production process for your application.