
Custom molded pulp packaging requires an upfront investment in tooling. Naturally, buyers want to know whether that investment can be reduced.
Often, it can. But the best savings rarely come from simply choosing the lowest mold quotation. They come from making better decisions before tooling begins: keeping the packaging no larger than necessary, planning how different products will be sold, validating uncertain details early, and choosing a tooling configuration that matches actual production needs.
The objective is not to make the mold as cheap as possible. It is to avoid paying for tooling, dimensions, and later revisions that the project never needed in the first place—while preserving product protection and reliable production.
What Determines Molded Pulp Tooling Costs?
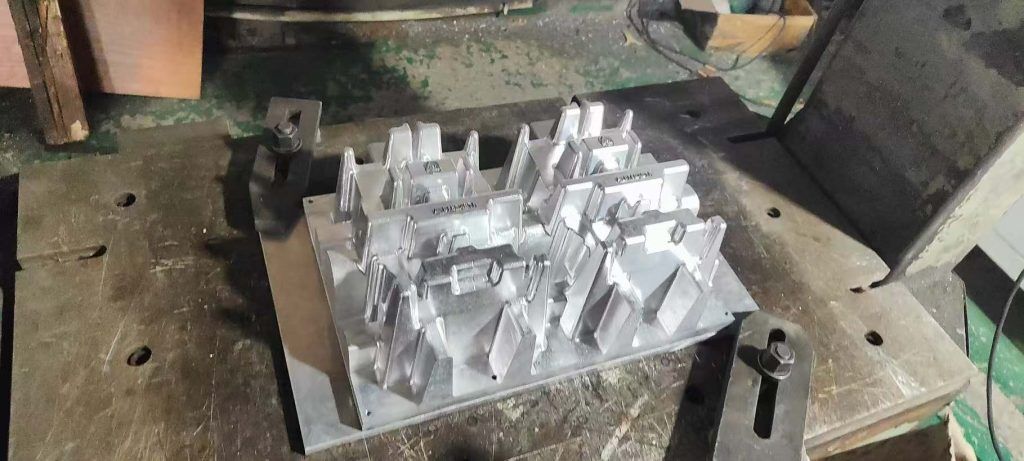
Tooling costs are mainly influenced by the production process and the size of the molded pulp part. Structural complexity, mold cavity count, and any supporting tools required for production also matter.
Some of the main factors include:
- Dry-pressed or wet-pressed production
- Overall length and width
- Product height and forming depth
- Structural complexity
- Number of cavities in the production mold
- Forming, hot-pressing, trimming, or punching requirements
Among these factors, product height deserves particular attention. A deeper part can affect mold construction, material use, forming difficulty and demolding. This means that adding height without a clear functional reason may increase more than one part of the project cost.
1. Avoid Unnecessary Packaging Height
Protective packaging needs enough space to absorb impacts and hold the product securely. However, more space does not automatically mean better protection.
We sometimes see designs with very tall sidewalls, deep cavities, or generous empty spaces added “for cushioning.” If those features are not aligned with the product’s weight, vulnerable areas, and actual distribution risks, they may add tooling and material costs without improving performance.
The same issue can arise when a molded pulp insert is enlarged simply to fit an existing outer carton. Keeping the current carton may initially seem like the economical choice, but it is worth comparing the complete packaging cost.
A larger molded pulp part may require:
- Larger or deeper tooling
- More pulp per piece
- Fewer mold cavities
- More storage space
- Higher freight costs
In some cases, ordering a new outer carton with more suitable dimensions is less expensive than enlarging the molded pulp insert just to fill an old box. The decision should be based on the combined cost of the insert, carton, storage, and transportation—not on one component alone.
This does not mean making the package as small as physically possible. Adequate clearance, cushioning, structural support, and ease of assembly still matter. The goal is to remove unnecessary volume while keeping every dimension that serves a genuine protective or operational purpose.
2. Plan the Sales Format Before Opening the Mold
One of the most effective ways to control tooling investment is to decide how the products will be sold before the packaging is designed.
Will each product be sold individually? Will several products usually be sold as a fixed set? Will customers be able to build their own combinations? Are individual and gift-set formats both necessary?
These are sales questions, but they directly affect the tooling plan.
If products will mainly be sold as a fixed set, it is usually more efficient to design the molded pulp packaging around that set from the beginning. Opening separate molds for every individual item and later deciding to introduce a set can result in another design and additional molds.
For a product family, buyers should provide all relevant SKUs, dimensions, shapes, and common purchasing combinations at the start of the project. This allows the packaging designer to consider the entire range rather than solving one product at a time.
Can Similar SKUs Share One Insert?
Sometimes they can.
Products with similar dimensions and shapes may be able to share a cavity or insert. A carefully planned allowance, support point, or local retaining feature can improve compatibility between nearby sizes.
However, a universal insert should not become so loose that it stops holding any product properly. If bottles, jars, devices, or accessories differ significantly in size or geometry, forcing them into one common design may reduce stability and protection.
The right question is not simply, “Can we use one mold?” It is:
Can one mold serve these products while maintaining acceptable fit, protection, presentation, and packing efficiency?
In some projects, one shared insert is practical. In others, two carefully grouped designs may be better than either one overly universal insert or a separate mold for every SKU.
Reduce Separate Parts Where Practical

The sales format also creates opportunities to simplify the packaging structure. For example:
- A hinged or connected structure may replace separate upper and lower pieces.
- A set insert may provide both separation and retention without extra dividers.
- Several related items may be organized in one molded part instead of multiple small trays.
Fewer components can mean fewer molds, simpler assembly, and easier inventory management. But simplification should always be evaluated against protection, molding feasibility, and the user’s unpacking experience.
3. Choose the Right Validation Path
Another common source of unnecessary tooling expense is opening a production mold before the product and packaging concept are sufficiently confirmed.
Early validation does cost money, but it can prevent a much larger expense if the production mold later needs substantial adjustment or replacement.
3D-Printed or Resin Prototypes
A solid prototype can be useful for checking:
- Overall size and product fit
- Placement of different components
- Assembly and removal
- Basic clearances
- The arrangement of a product set
- Compatibility with the outer carton
This is especially valuable when the product has an irregular shape or when several SKUs are expected to share the packaging.
A resin prototype does have limitations. It cannot fully reproduce molded fiber thickness, cushioning behavior, surface texture, shrinkage, or production tolerances. It should therefore be used to answer dimensional and structural questions, not as a substitute for every paper-pulp performance test.
Sample Tooling

Sample tooling becomes more valuable when:
- The structure is complex
- Fit requirements are relatively precise
- The actual molded pulp surface or material must be reviewed
- Water or oil resistance needs to be tested
- Transport performance needs to be evaluated
- The production tooling investment is substantial
- The package will be used in automated or semi-automated packing
Depending on the project and tooling arrangement, part of a sample-mold investment may sometimes be credited toward subsequent production tooling. This should be confirmed for the specific project rather than assumed.
Going Directly to Production Tooling
Not every project requires a separate sample mold. Direct production tooling may be reasonable when the structure is simple, the product dimensions are final, the material and process are confirmed, and similar packaging has already been produced successfully.
The decision should reflect uncertainty and risk. Skipping validation is not a saving if unresolved questions later require major tooling changes.
4. Choose the Tooling Configuration the Process Actually Requires
A molded pulp project may involve more than one tool. The correct configuration depends on the production process, required finish, edge design, holes, and other structural details.
Forming and Hot-Press Tools
Dry-pressed and wet-pressed molded pulp use different production routes and tooling configurations.
Wet-pressed products normally require forming, hot pressing, and trimming to achieve their characteristic thin walls, smooth surfaces, and clean edges. Buyers should therefore evaluate the required tooling as a complete system rather than compare the price of one mold in isolation.
For dry-pressed packaging, the edge can sometimes be designed as a formed flange that does not require separate trimming. If a flatter or more consistent edge is needed, a hot-pressed flange may also be considered. The appropriate solution depends on the appearance, fit, assembly, and production requirements of the part.
This is an area where early design choices matter. Planning the flange correctly can keep a dry-pressed structure practical without adding a process that the product does not need.
Holes and Special Cutouts

Some holes, openings, or recessed features can be created during molding. Others cannot be formed cleanly because of their position, direction, or geometry and may require a separate punching tool or secondary operation.
These details should be discussed during structural design. Adding holes after the main tooling has already been completed may require a new assessment of both the design and the production method.
If a hanging hole, cable opening, ventilation area, drainage hole, or locking feature is required, showing its exact position and function early gives the engineer more freedom to select an efficient solution.
5. Balance Mold Cavities with Long-Term Demand
Reducing the number of mold cavities can lower the initial tooling investment, but it may also reduce output and increase the unit production cost.
A low-cavity mold may be suitable for a market trial or a product with modest annual demand. For a stable, high-volume program, investing in more cavities can improve production efficiency and shorten lead times.
The tooling decision should therefore consider:
- Initial order quantity
- Expected annual demand
- Required delivery schedule
- Product lifecycle
- Likelihood of demand increasing
The cheapest mold at the beginning is not always the most economical mold over the full life of the project. At the same time, buyers should not invest in high-output tooling based only on optimistic forecasts. The configuration should be proportionate to realistic demand.
6. Where Buyers Should Not Cut Costs
There are sensible ways to reduce tooling investment, but some shortcuts can create greater costs later.
Buyers should be cautious about:
- Opening tooling while the product dimensions are still changing
- Skipping necessary fit or performance validation
- Making one insert excessively universal to avoid a second mold
- Removing essential ribs, retaining points, or cushioning distance
- Enlarging the molded pulp part only to reuse an unsuitable outer carton
- Choosing too few cavities without considering output and lead time
- Comparing mold totals without checking what each quotation includes
- Prioritizing the lowest tooling price over stable production and packaging performance
A packaging design must work not only in a drawing, but also during molding, packing, storage, transportation, and customer use. Savings that weaken one of these stages are rarely true savings.
What to Prepare Before Requesting a Tooling Proposal
Better project information makes it easier to identify genuine cost-saving opportunities. Before requesting a tooling proposal, prepare as much of the following as possible:
- Product samples, accurate dimensions, or 3D files
- Product weight and vulnerable areas
- A complete list of relevant SKUs
- Common product combinations
- Individual or set-sales plans
- Existing outer-carton dimensions and whether they can change
- Preferred dry-pressed or wet-pressed appearance
- Initial order quantity and estimated annual demand
- Edge, hole, printing, or surface requirements
- Packing method and transportation conditions
- Required validation or testing
Not every detail needs to be final before the first discussion. However, sharing the broader product and sales plan helps prevent a packaging solution from being designed around incomplete information.
Final Thoughts
The most effective molded pulp tooling savings usually happen before the mold is made.
Keeping the packaging at a functional size, planning individual and set-sales formats together, reviewing all related SKUs, validating uncertain details, and selecting an appropriate tooling configuration can reduce unnecessary investment without weakening the packaging.
The aim is not to purchase the fewest or cheapest tools at any cost. It is to build the simplest tooling plan that can reliably protect the product, support the intended sales strategy, and perform consistently in mass production.
Planning a custom molded pulp packaging project? Share your product dimensions or 3D files, expected order volume, outer-carton information, and common product combinations with InNature Pack. We can help evaluate the tooling plan and identify unnecessary costs before production begins.